I love the way there's always something new to learn about knitting. I'm not talking entrelac, steeking, double knitting, intricate lace and all the rest of that complicated stuff, I'm talking decreasing.
Of course you know how to k2tog for a right leaning decrease, and you've outgrown skpo and moved onto SSK for a left-leaning decrease. You might know how to do their equivalents on a purl row. You might even know about the improved SSK (although it doesn't improve much for me I have to admit).
But if you know about working through the back of the stitch in the row above an SSK and you haven't told me, then I may have to reassess our friendship.
I've been playing with 'contoured' or 'shaped' intarsia for nearly a year now, which involves increasing and decreasing either side of the colour change in intarsia in order to make a smooth 'contoured' line instead of the traditional intarsia pixellated line. Because of this I have a geeky obsession with increases and decreases. I follow links on Pinterest, I watch video tutorials on YouTube and I can safely say I know an unhealthy number of ways to increase and decrease in my knitting.
But I never knew that if you work into the back of the stitch in the row above an SSK then it does marvellous things.
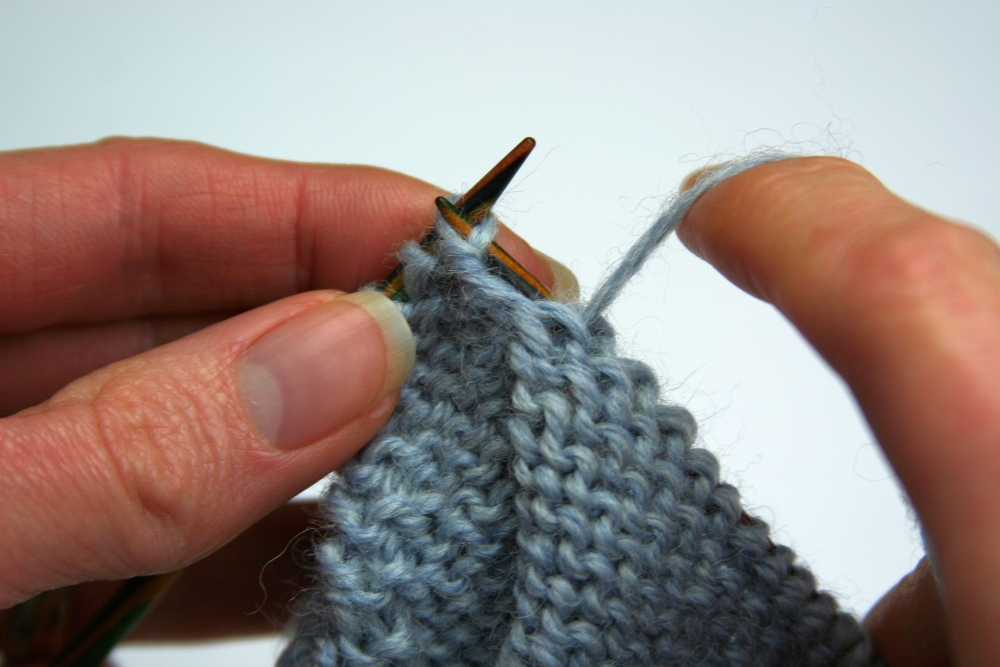
Imagine you've worked an SSK on a knit row (I'll call it Row 1). Then when you purl back along Row 2, purl into the back of that SSK stitch from Row 1:
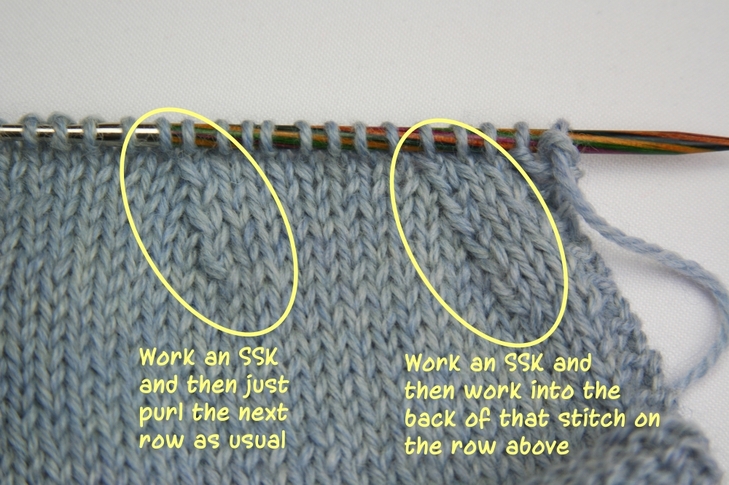
Below, on the left of the picture I've worked a few rows of SSKs on the knit row and then just purled that stitch on the next row as usual. On the right of the picture I've worked an SSK on the knit row and then purled into the back of that stitch on the next row:
How beautiful is that row of decreases on the right compared to those on the left?
I learnt about this little trick in a video from Cat Bordhi, where she explains the 'hungry stitch' technique. She uses a slipped stitch on the row below the SSK to remove excess yarn out of the SSK and neaten up the decrease even further. She mentions, almost in passing, to work into the back of the stitch on the row above. The 'hungry stitch' is too complicated for me on my contoured intarsia patterns, which are already a little bit crazy. But that working into the back of the stitch thing - that is beautiful.
Wendy x


