
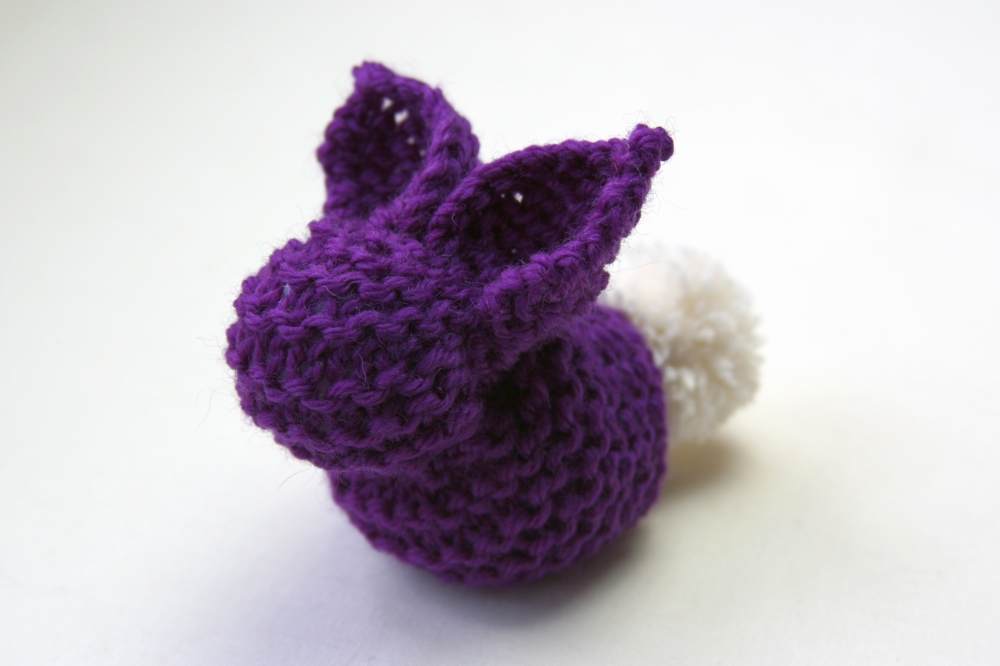
I saw this Garter Stitch Square Bunny on Pinterest. The knitting part is so easy - just a garter stitch square - that I tried it out to see if it would be any good for the school knitting group that I'm hoping to set up. The school is in a state of upheaval at the moment with the long-standing headteacher leaving at Easter, so they've asked for the group to be put on hold for a while. I'm hanging on in there though; those children are desperate to learn to knit, I just know it.
To make the bunny, I used...
A small quantity of DK yarn
4mm needles
Toy stuffing
A contrast colour for the pompom tail.
A blunt-ended sewing needle.
A small quantity of DK yarn
4mm needles
Toy stuffing
A contrast colour for the pompom tail.
A blunt-ended sewing needle.
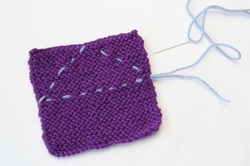
Cast on 23 stitches, knit in garter stitch until you have a square. (Tip: to check if you've knitted a square without using a ruler, lift a corner of the cast on edge up to the diagonally opposite corner on the needle. If the edges are aligned then you've got a square.) Cast off.
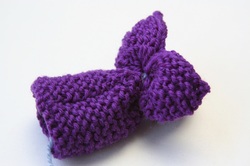
Use running stitch to sew a triangle shape on the knitted square, as in the picture. Obviously it's better to use matching yarn for the sewing.
Use running stitch to sew a triangle shape on the knitted square, as in the picture. Obviously it's better to use matching yarn for the sewing.

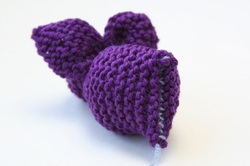
Pull on the ends to make your bunny's face and ears. Put some stuffing in the head area.
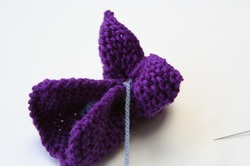
Adjust the ears so that they point nicely forwards and then pull the running stitch tight and securely sew everything closed between the ears. .
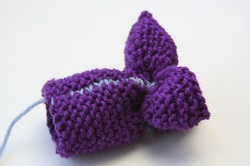
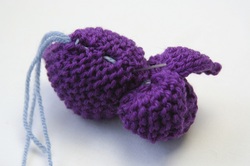
Use mattress stitch to close up the seam on bunny's back...
... making sure to pull to close the seam neatly (my favourite bit).
Put stuffing inside the body and then use mattress stitch to sew up the end seam.
Use running stitch all the way from the bottom of the rabbit up to the base of the ears and then pull tight and secure to give bunny the nice rounded shape.
This bit is a little fiddly and I had to experiment a little to get it right. Make sure the yarn is secured very well at the top.
This bit is a little fiddly and I had to experiment a little to get it right. Make sure the yarn is secured very well at the top.
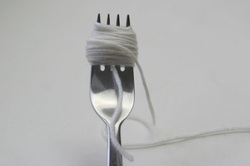
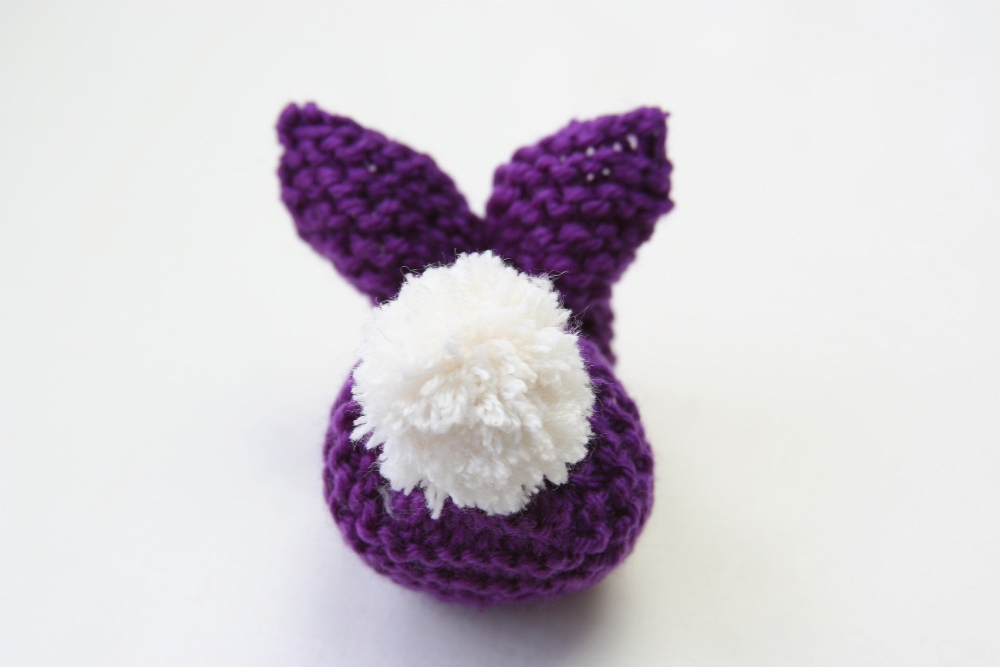
You can use a fork to make a small pompom for the tail. Lay a shortish (20cm) length of yarn through the middle tines of the fork, then start winding a long length of yarn around the fork width. When you've finished, tie the shorter yarn tightly around the wound yarn. Pull it off the fork and then cut the loops just as you would normally when making a pompom. It will need neatening up with scissors to make a nice rounded shape.
Firmly attach tail to bunny.
Firmly attach tail to bunny.
I'm in two minds as to whether this is a useful project for a children's knitting group. The square itself needs to be quite neat and robust to stop stuffing poking out, while beginners often have tension issues and holes. Plus it's fairly tricky to sew the bunny together, as you have to hold everything tight while its secured into place. Maybe too tricky for a child.
It's cute though.
Wendy x
It's cute though.
Wendy x